

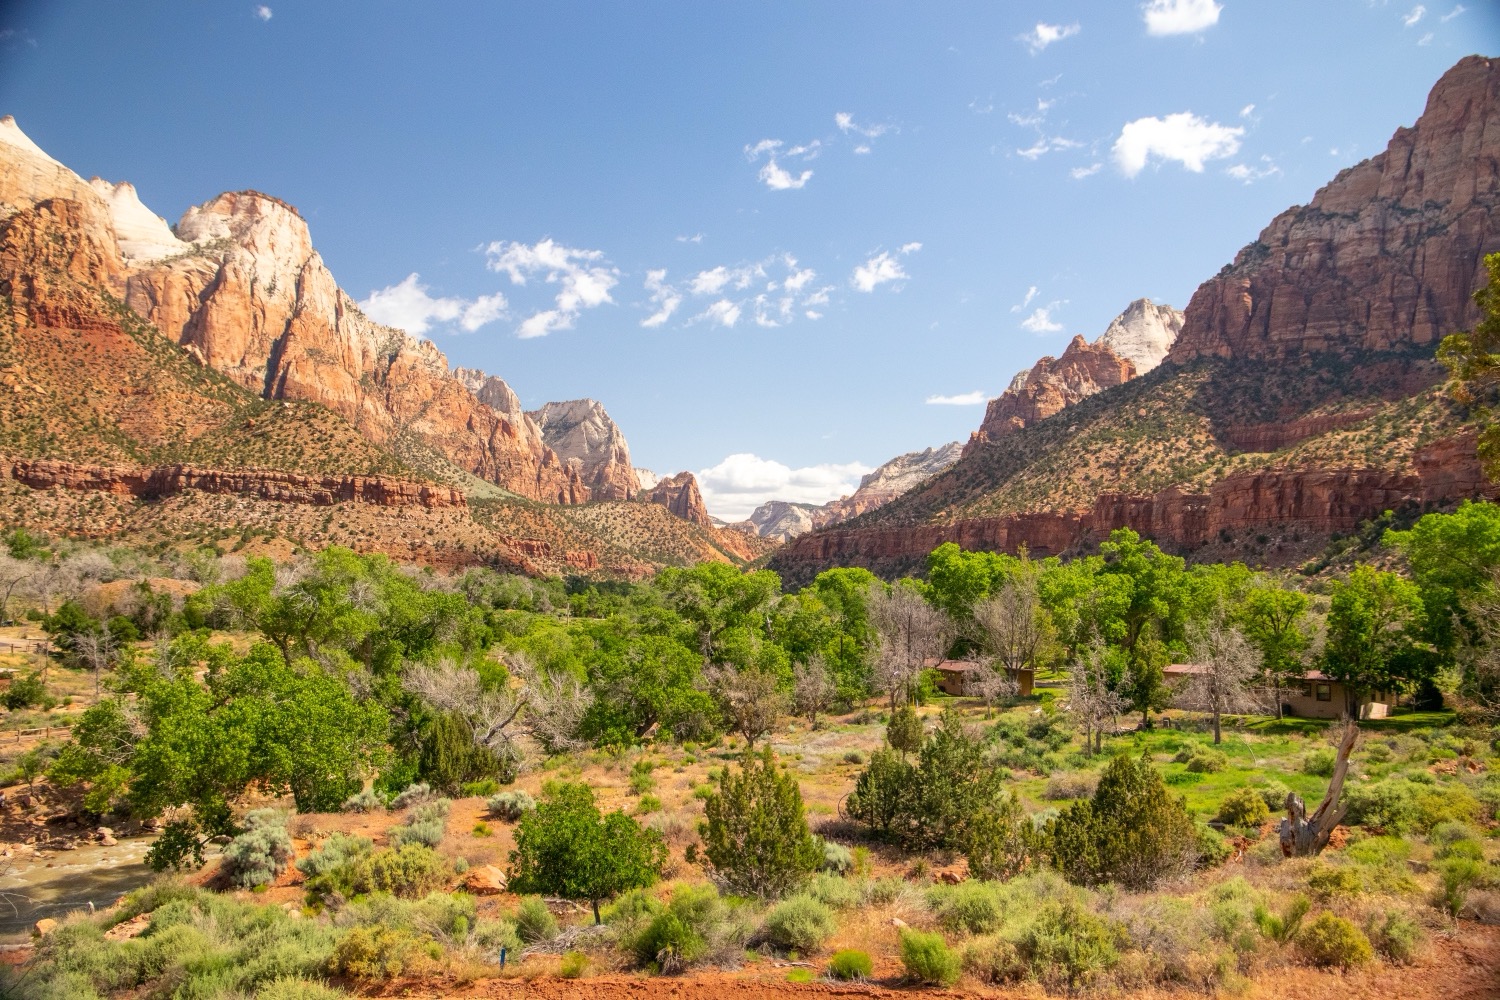
Towering red rock canyons, dramatic cliff faces, and some of the most heart-pumping trails in the American Southwest—a Zion National Park itinerary is the ultimate desert adventure. We spent five incredible days exploring the heart of the canyon, from the dizzying heights of Angel's Landing to the exclusive, water-carved tunnels of The Subway. Whether you’re a first-timer navigating the shuttle system or a seasoned hiker chasing elusive permits, this guide will help you plan the perfect trip. I’ll break down where to stay, how to win the permit lotteries, and our exact day-by-day route through Zion’s most iconic landscapes.

- Day 1: Explore park hikes and viewpoints via the shuttle bus
- Day 2: Drive Zion Park Boulevard, check out the canyon overlook trail and Checkerboard Mesa
- Day 1: The Subway (permit required)
- Day 2: Relaxed day - Watchman Trail, shuttle tour, Weeping Rock
- Day 3: Angel's Landing (permit required) + Emerald Pools
- Day 4: Drive Zion Canyon Boulevard, check out Checkerboard Mesa
- Day 5: Snow Canyon State Park
This pacing meant we never felt rushed and could truly soak in the experience. It also gave our legs a little break between the two intense hikes.
For most travelers, the journey to Zion begins with a flight into Las Vegas. As a major hub with connections from around the world, Vegas offers the easiest access point plus plenty of affordable rental car options. We spent our first night in the city before making the early morning drive to the park.
The drive from Las Vegas to Zion takes about three hours, but you'll cross into a different time zone when you enter Utah, losing an hour of your day.
When it comes to accommodation, you have two main options: stay in the charming gateway town of Springdale right at the park entrance, or save money by staying further out in towns like St. George, Hurricane, Leeds, or Rockville.
Springdale (2-3 nights): Yes, it's significantly more expensive—expect to pay at least $100 more per night year-round. But the convenience is unmatched. We stayed at the Zion Park Motel, one of the more affordable options in town. Don't let the dated aesthetic fool you; the rooms were spacious, clean, and comfortable. The staff went above and beyond, helping us plan our itinerary and even letting us park for free for an extra day after we checked out.
The location at Bus Stop 5 puts you within walking distance of great restaurants. Pro tip: During peak times (like bank holiday weekends), buses often fill up before reaching Stop 5. Since it's only a 20-minute walk to the park entrance, we'd recommend walking rather than waiting 30-40 minutes for a bus with space.
We stayed in Zion Park Motel, a really great budget option in Springdale. Although outdated, it is clean and comfortable, we would recommend it.
St. George (for extended stays): After our initial nights in Springdale, we moved to the Clarion Suites in St. George to stretch our budget a little further. The included breakfast was a nice bonus!
It's a 50-minute drive to Zion, so it is definitely an option for more budget conscious travelers. It's also close to other sights to see like Snow Canyon State park.
From March to November Zion National Park is closed to private vehicles, which means you'll be relying on the free to use shuttle bus network. Understanding how it works will save you time and frustration.
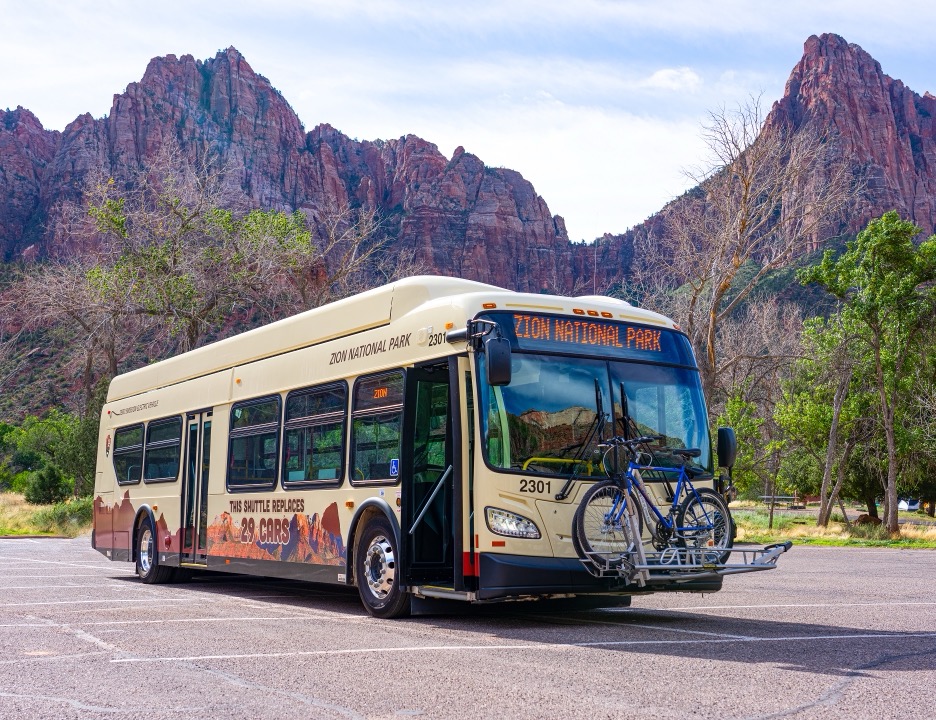
Springdale Line: Runs 3 miles from the Majestic View Lodge to the Visitor Center with 9 stops total. Buses come every 15 minutes. The catch? At peak times, buses fill up at the first two stops (where people park at the edge of town), meaning they're often full by the time they reach downtown Springdale.
Zion Canyon Line: Operates March through November, running from the Visitor Center to Temple of Sinawava (Stop 9) with buses every 5-10 minutes. The full journey takes about 45 minutes each way. During the off-season, personal vehicles are allowed on this route.
Make sure to check the last bus time of the day—it varies by season, and you don't want to be stranded!
For more information on the shuttle buses, check out the Parks Service website.
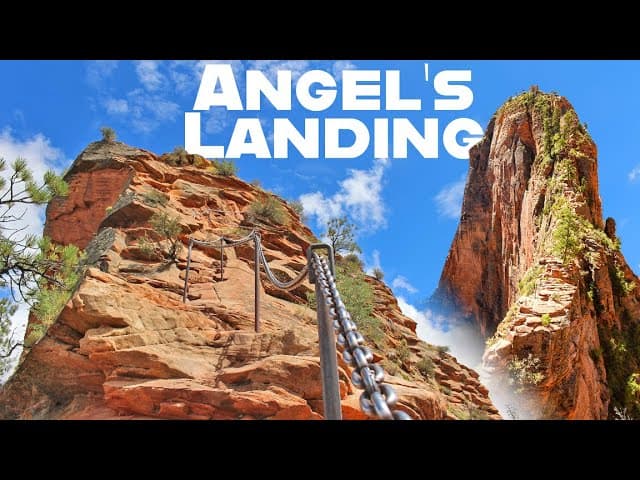
If you can only get one permit, make it Angel's Landing. This iconic hike delivers an unbeatable reward-to-effort ratio over 3-5 hours of constantly changing, jaw-dropping scenery.
| Distance | 9.5km out and back |
| Elevation gain | 850m |
| Time | 3-5 hours |
| Difficulty | Strenuous |
| Permits | 800 available daily |
| Shuttle bus stop | 6 - The Grotto |
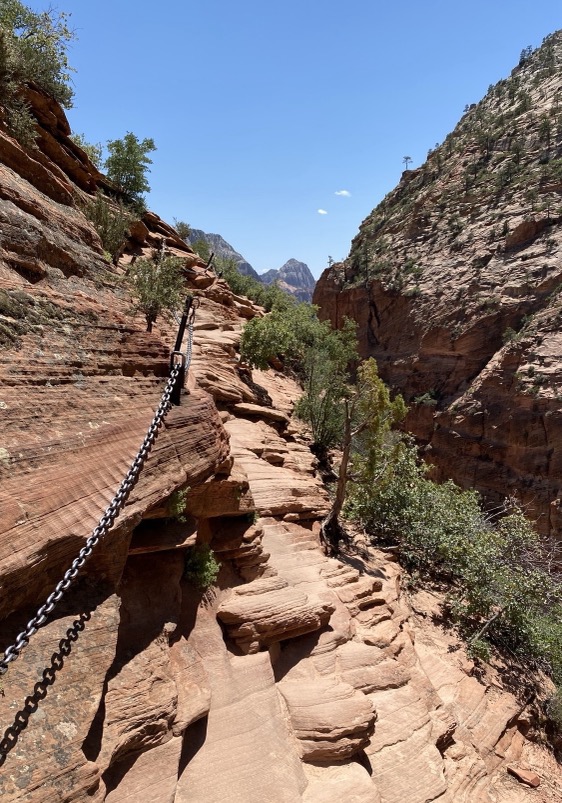
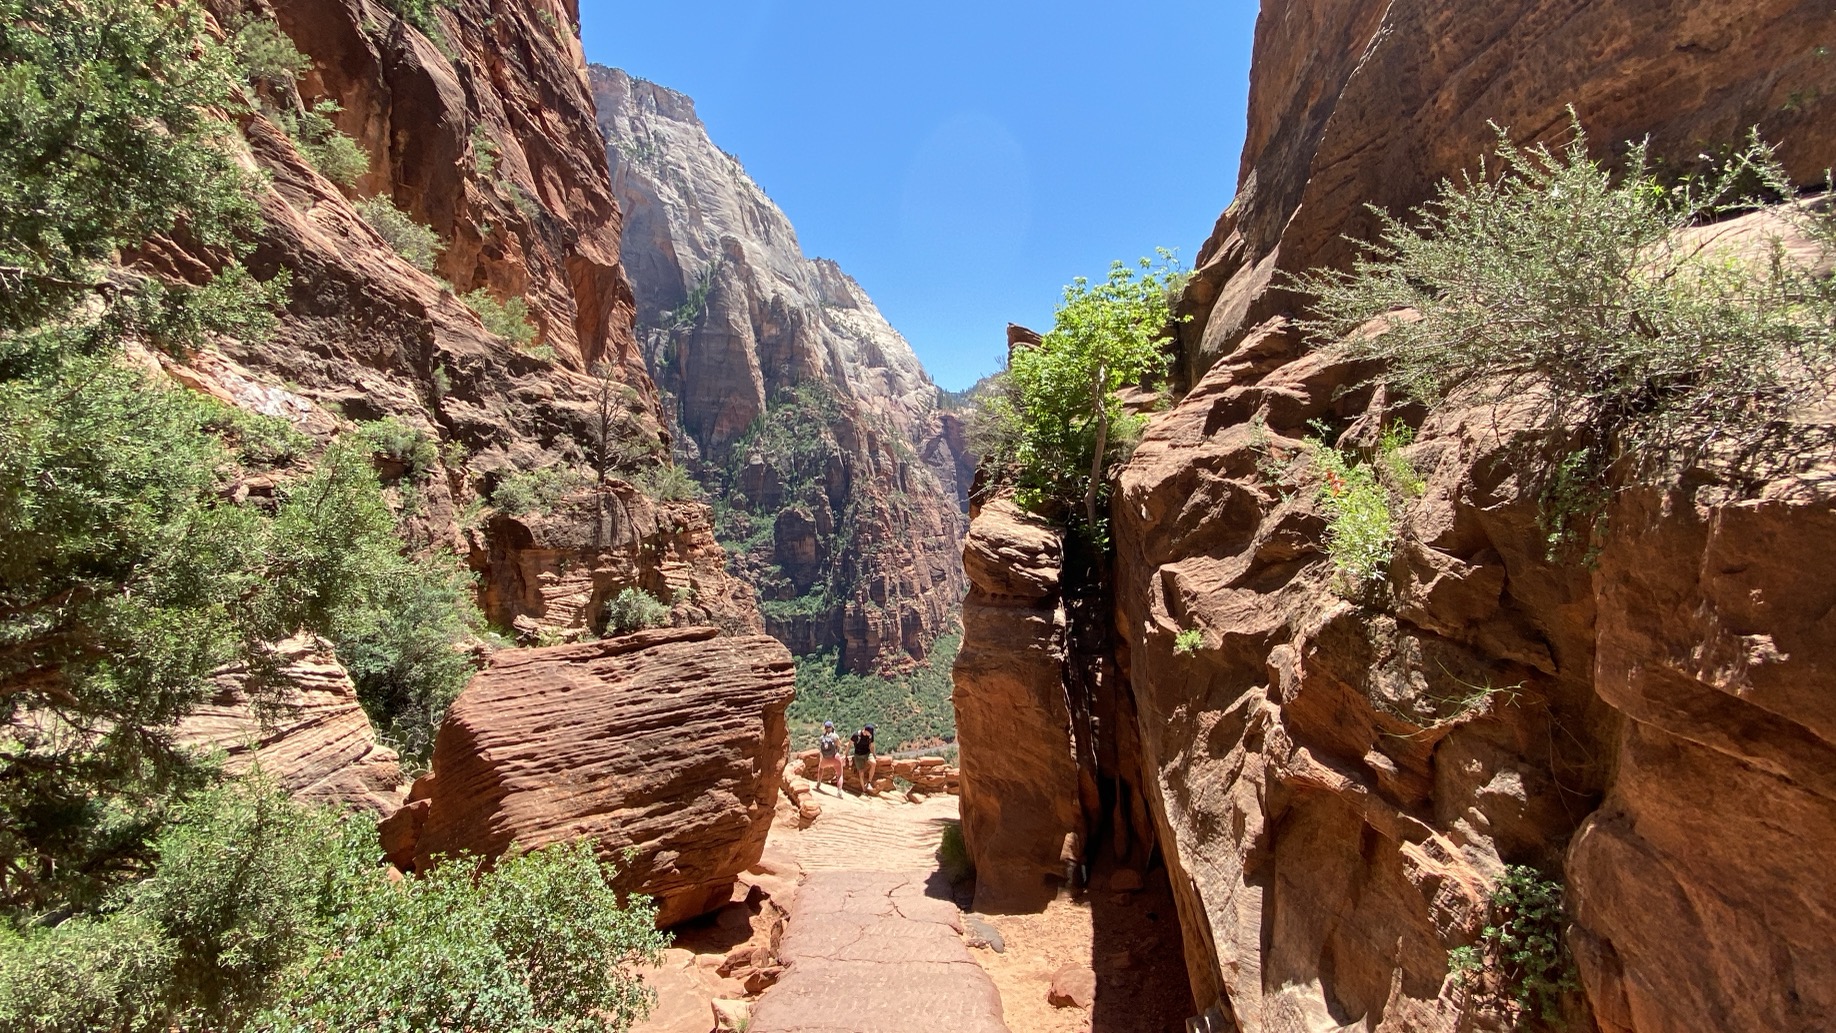
The hike begins on the West Rim Trail and climbs steeply up switchbacks with little shade, so bring at least 2L of water per person. After ascending through dramatic canyon walls that offer temporary respite from the sun, you'll reach Scout Lookout—already an incredible viewpoint in its own right. You don't need a permit to get to Scout Lookout.
From there, the real adventure begins. Angel's Landing itself is not for the faint of heart. You'll scramble on all fours in places, with chains bolted into the rock for support on some (but not all) sections. The exposure is intense—you can see the long drop the entire time. If you're afraid of heights, or of falling, you're probably best just hiking to Scout Lookout.

You can apply for a permit online and at the park. Everything you need to know about permits can be found here: NPS Angel's Landing Permits
We applied for a permit via the lottery. We picked several days that could have worked for us and hoped that we got one of them.
If you don't win the permit lottery in advance, don't worry. There is a second set of permits you can only apply for a day in advance, so you have another chance to gain access to this trail.
Can't get a permit? The hike to Scout Lookout doesn't require one and offers comparable valley views. It's an excellent consolation prize.
| Distance | 16km out and back |
| Elevation gain | 736m |
| Time | 6-9 hours |
| Difficulty | Strenuous |
| Permits | 80 available daily |
| Shuttle bus stop | Not on the shuttle bus route, you'll need to drive here |
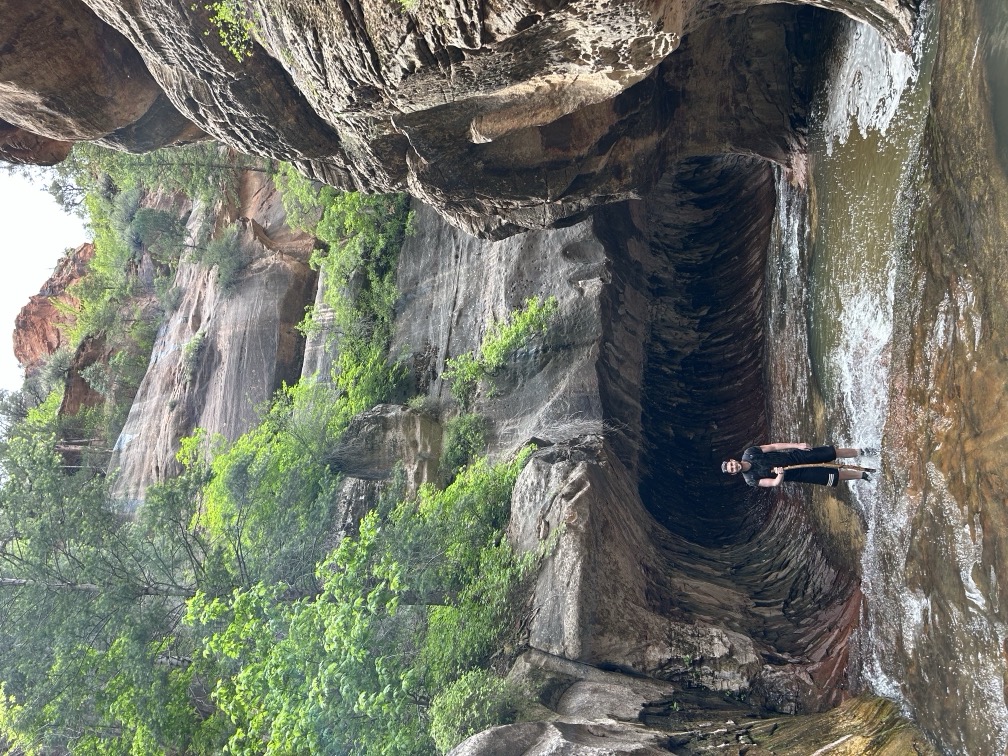
The Subway is a much longer, more challenging, and far more exclusive trail, with a truly wild and remote feeling. While the scenery doesn't vary as much throughout the hike, the unique subway-shaped rock formation at the end is something you can't see anywhere else.

The trailhead is a 30-minute drive away from the main entrance in Springdale, located here.
October to March are the best months to hike as the weather is coolest and the overall demand for permits is lower. We hiked it in May, the weather was hot, so most hikers start the trail in the morning.
June through September are extremely hot, and also the most popular months.
We recommend bringing at least 2 liters of water per person (ideally 3-4). There's no breeze in the canyon so it can get very sweaty, and the midday sun leaves no shadows.
Bring snacks to keep your energy up, and a waterproof bag (the only lavatory on the trail is at the trailhead carpark, and you cannot leave anything behind on the trail except footprints).
Sunscreen and a good hat are mandatory, this is not a place you want to get heatstroke.
We wished we had brought UV protective hiking shirts, this would have kept us a lot cooler.

Let's be real: getting a permit is the biggest challenge, with only 80 spots available every day.
You've got three main shots at this:
Seasonal Lottery (best odds): Apply 2+ months in advance through Recreation.gov. 60 of the 80 daily permits go through this system. There a non-refundable $6 fee just to enter, plus $10 per person if you win. You can apply online here: NPS The Subway
Daily Lottery (2 days before): If you missed the seasonal lottery, you can try 2 days before your hike. There are usually 150+ people vying for the 20 remaining spots, so don't count on this.
Walk-up permits (Hail Mary): Show up at the Wilderness Desk at the Visitor Center early. Because some parties apply multiple times, permits become available when multiple people in the same group win. Rangers say this is actually a decent bet, but it requires flexibility in your schedule, which is not ideal if you're flying in on a quick trip.
Pro tip: Apply for off-season (late October through March) if possible. Summer is brutal heat-wise anyway, and your permit odds go way up.
You'll need to head to a ranger station in Springdale to get your paper permit. A print-out of the permit confirmation email is not sufficient. There are rangers on the trail.
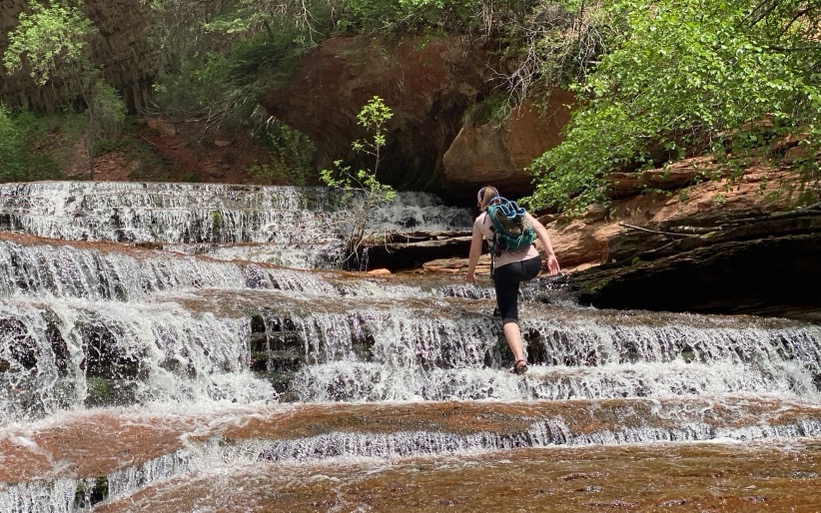
When hiking the Subway your feet will get wet. There's no way around it as the trail has you climbing up waterfalls and along the riverbed. The water temperature ranges from 4-6°C (40-45°F) in winter and 6-10°C (50-65°F) in summer.
The riverbed is very slippery in places as the rock is polished smooth and there's quite a lot of plant life under the water.
Your options:
- Rent canyoneering boots + neoprene socks ($29/day from shops like Zion Outfitter in Springdale): These boots have an astounding amount of traction even when wet, plus ankle support, and they'll keep your feet warm in the cold water.
- Your own hiking boots + neoprene socks: Works, but your boots will be soaked and unusable for 24+ hours.
- Water shoes or trail runners: Lighter and dry faster, but less ankle support on the scrambles.
We used our own hiking boots and switched to water shoes when the trail got wet. We found it was better to stick to our hiking books as they had more grip, which is what the park rangers we met on the trail recommended. Getting our feet in the water actually cooled us down a lot, which was welcome in the midday sun.
The Subway's exclusivity makes it feel like a special occasion. If you're looking for a quieter, more intimate Zion experience and don't mind the extra effort, it's absolutely worth pursuing.
Note: We couldn't do The Narrows during our May visit due to flash flooding risk—always check current conditions at the Visitor Center.
If you're not doing Angel's Landing, this hike is a must.
| Distance | 5.8km out and back |
| Elevation gain | 340m |
| Time | 3 hours |
| Difficulty | Challenging |
| Shuttle bus stop | 6 - The Grotto |
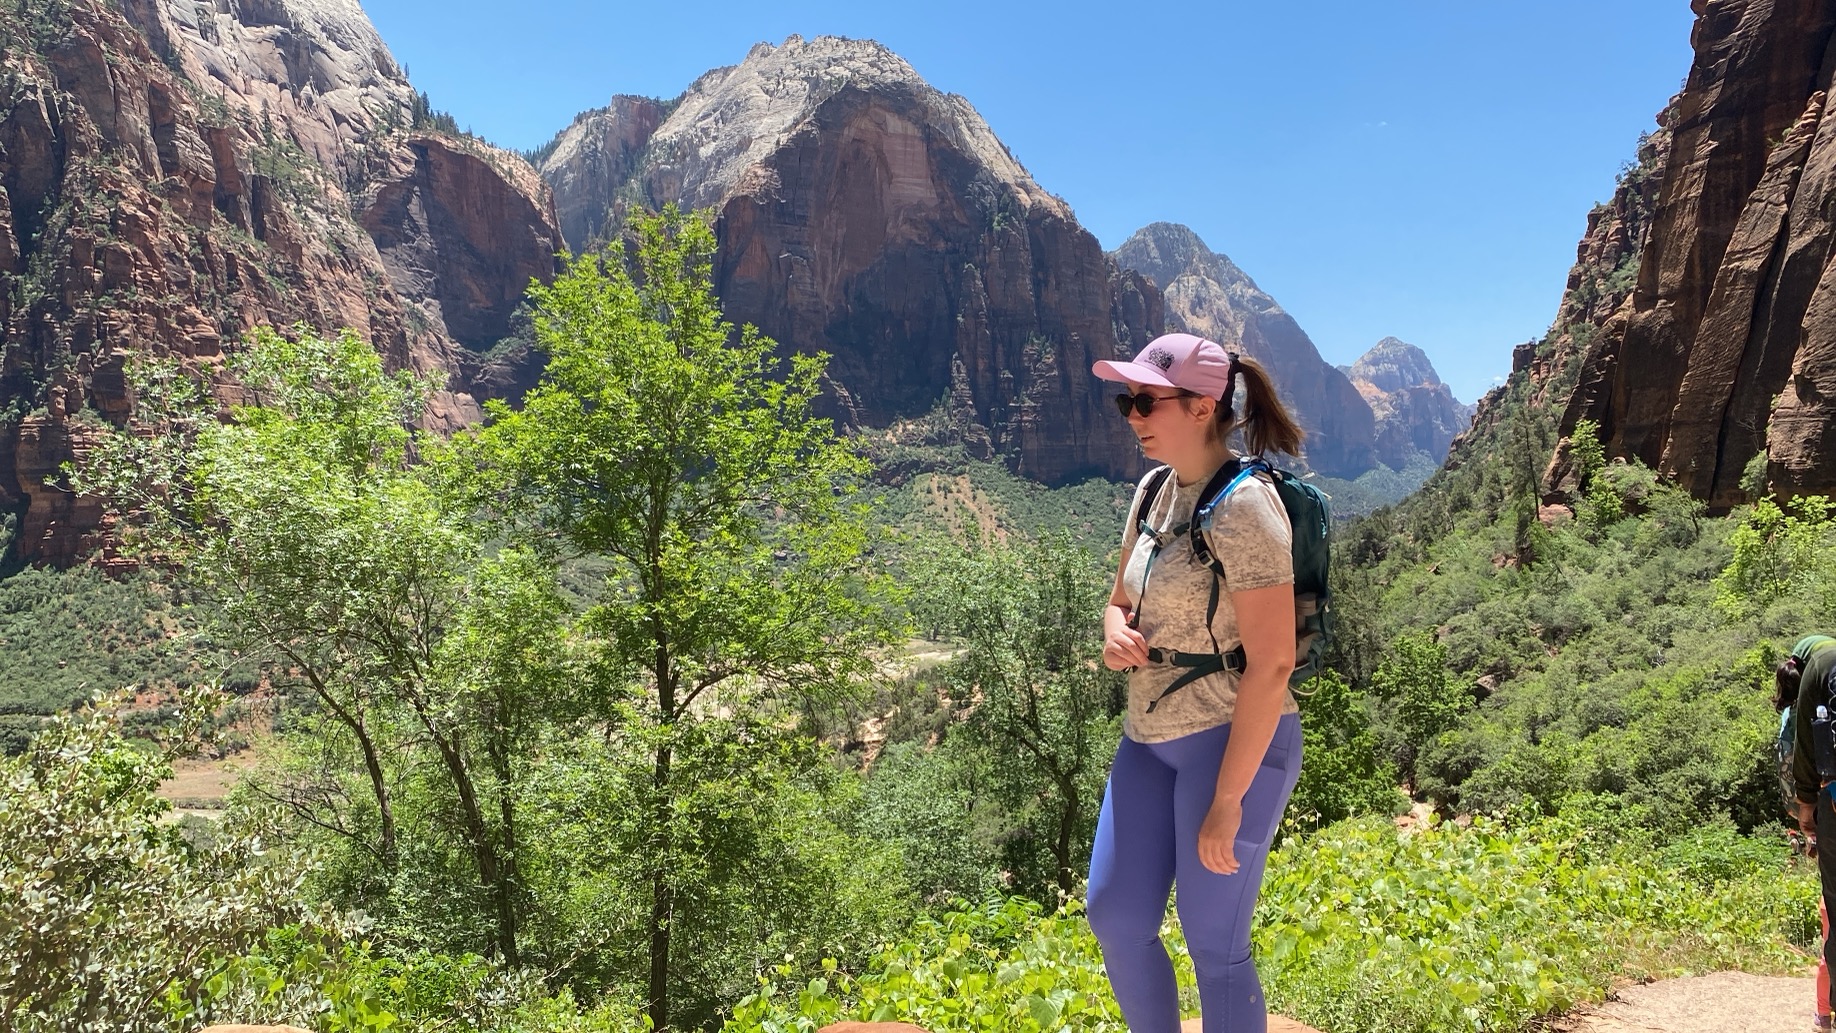
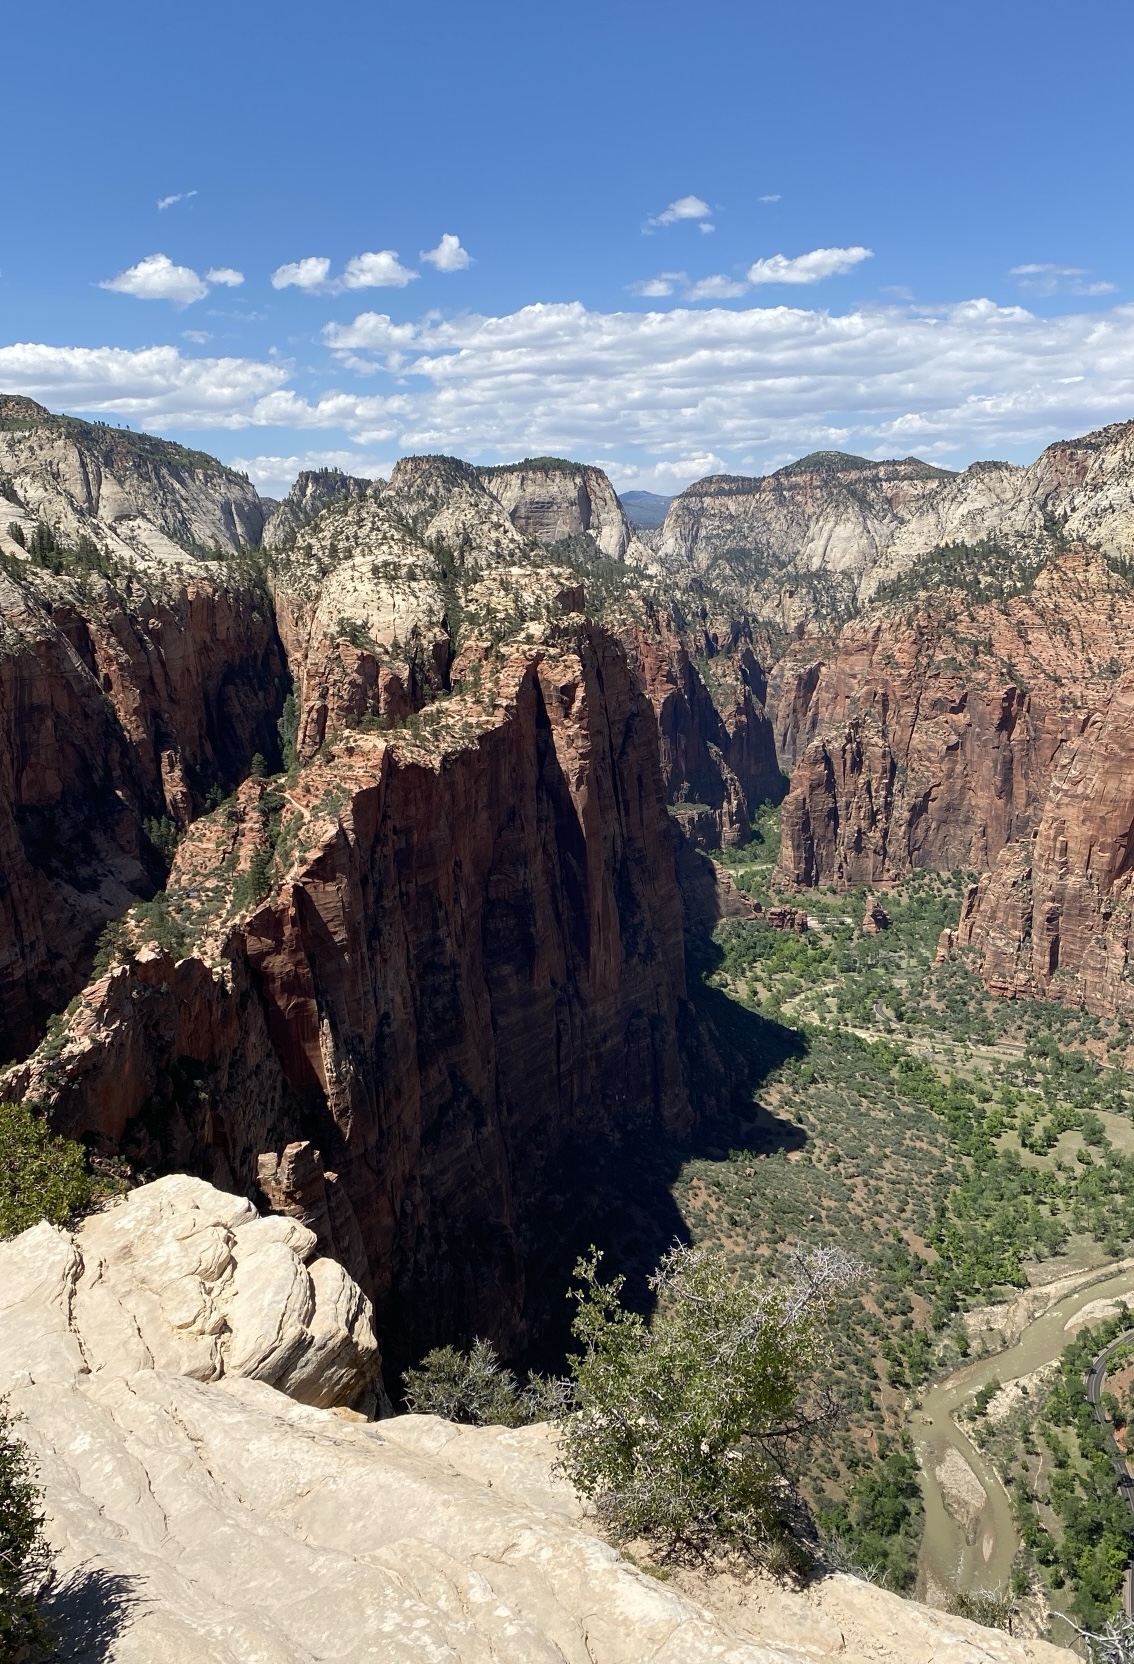
This steep climb up the canyon wall delivers one of Zion's most iconic views. We made the mistake of hiking at noon with zero shelter from the scorching sun. Learn from us and go early morning or mid-afternoon. The first set of switchbacks is brutally steep but once you're up there is some shade offered by the steep canyon rock walls which rise on both sides.
After the canyon section there's another set of steep switchbacks which lead up to the lookout. This is where you'll find rangers checking permits for Angel's landing, and a few lavatories.
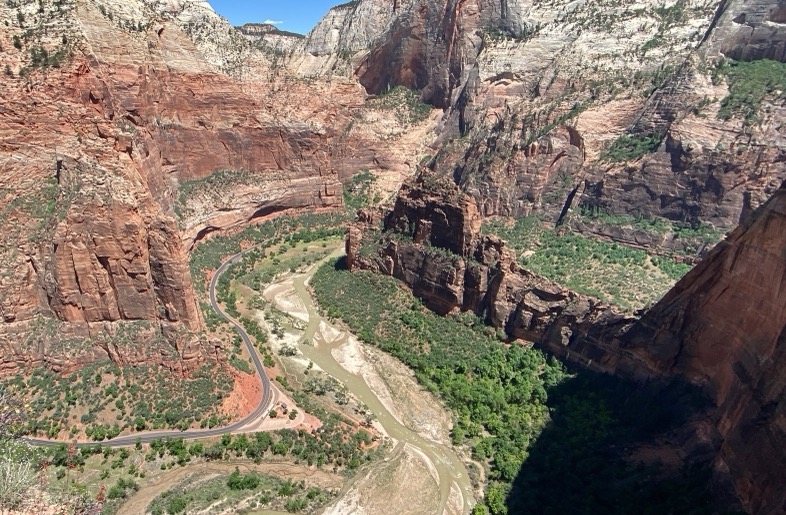
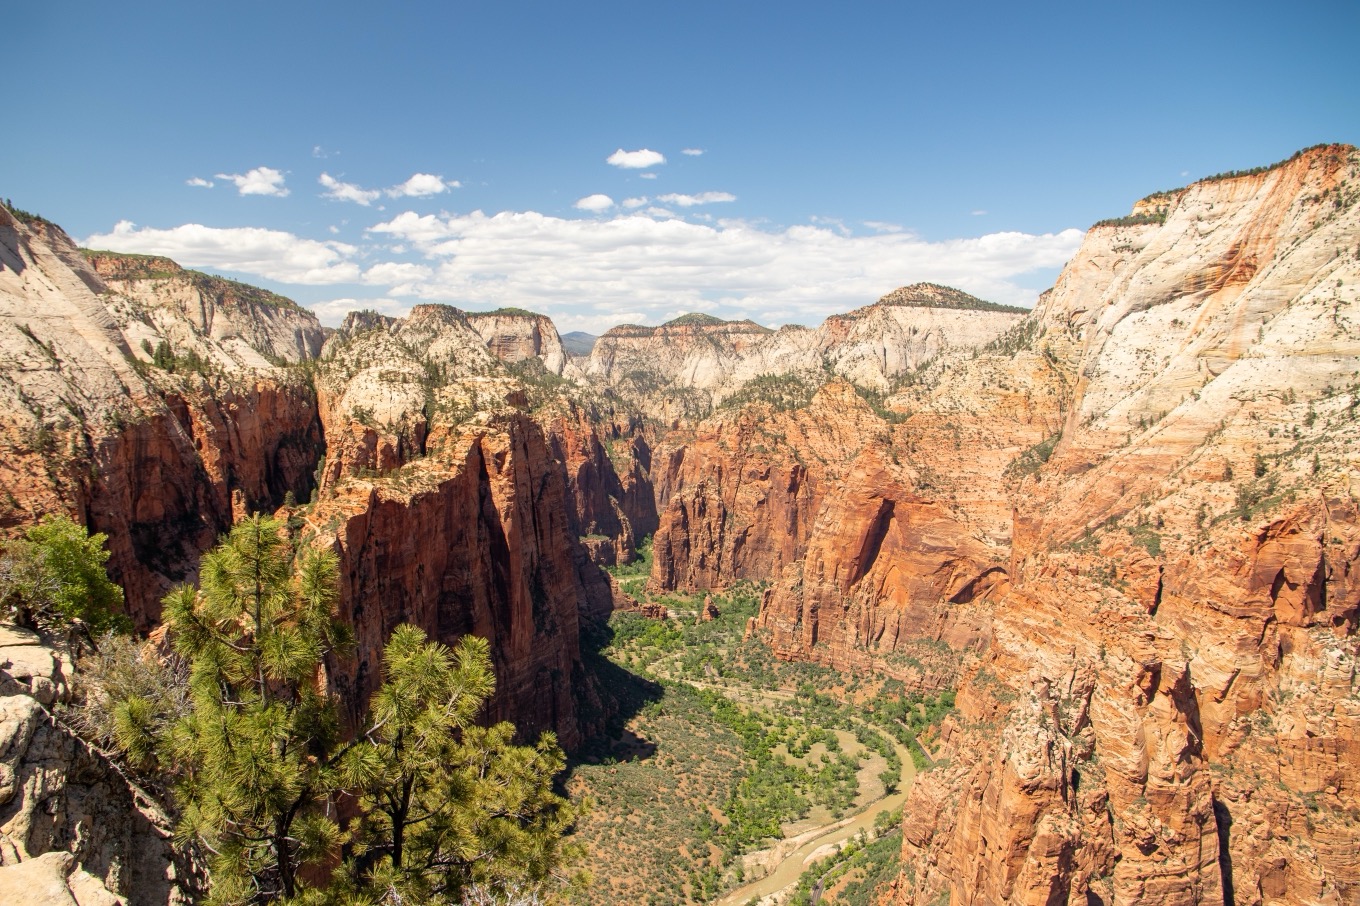
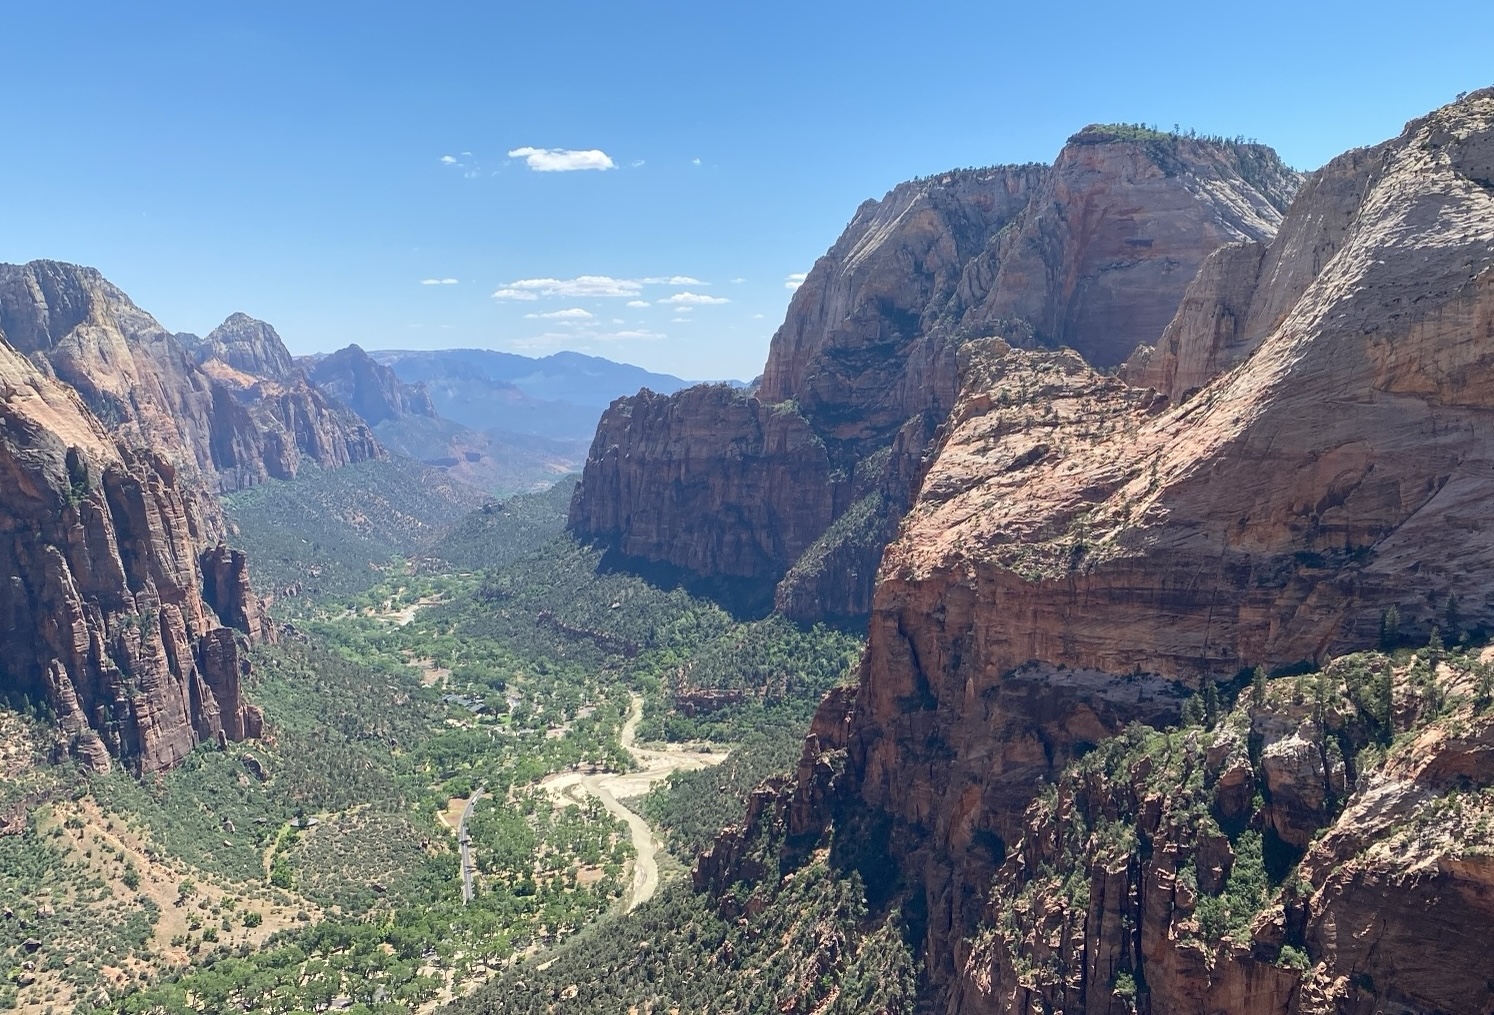
The lookout has arguably the best view of Angel's Landing jutting from the canyon wall. Turn the other direction for views up the valley toward Temple of Sinawava and The Narrows, where red cliffs give way to dramatic white rock with colorful streaks. Look down at the road and you'll see the shuttle bus in miniature, all the way at the bottom of the canyon.
| Distance | 5.0km out and back |
| Elevation gain | 194m |
| Time | 1 hour 20 minutes |
| Difficulty | Easy-Moderate |
| Shuttle bus stop | 1 - Zion Canyon Visitor Center |
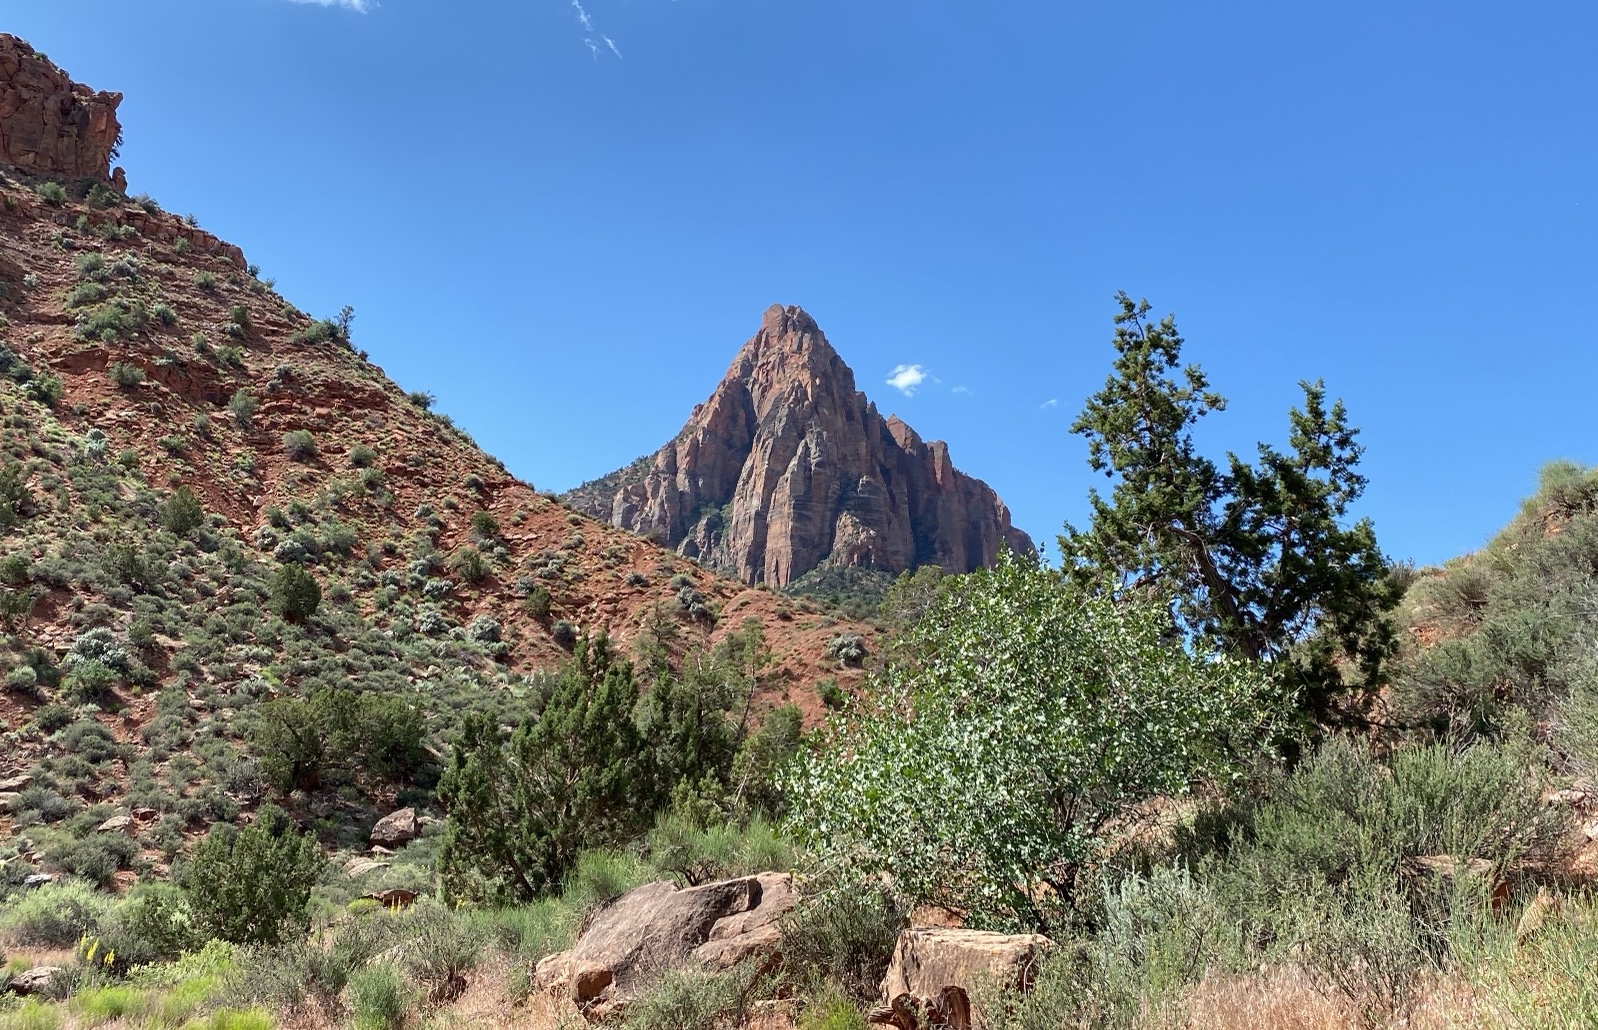
Starting right at the Visitor Center (no bus required!), the Watchman trail makes an excellent first hike and introduction to the park. The well-maintained trail is obstacle-free and lined with beautiful wild desert flowers. With every step, more of the magnificent red rock canyon walls reveal themselves.
The viewpoint at the top offers beautiful vistas of Watchman Peak and the surrounding canyon. Important note: the trail doesn't actually take you to the peak's summit. There's no trail up there, so this is the closest you can get.
| Distance | 3.6km out and back OR 4.8km loop |
| Elevation gain | 189m |
| Time | 1 hour 20 minutes |
| Difficulty | Easy-Moderate |
| Shuttle bus stop | 6 - The Grotto |
This hike shares a trailhead with Angel's Landing but turns left at the fork instead of right. It's the perfect way to kill time before an Angel's Landing permit slot or enjoy a gentler adventure.
The three pools are seasonal, so check at the Visitor Center before making the trek. If you go early in the season as we did, you'll witness water cascading off canyon walls into emerald pools below. The trail lets you stand beneath the waterfalls for some spectacular photos—seeing rainbows in this hot, dry desert is genuinely surreal.
The accessibility makes this extremely popular; on our long weekend visit, we waited in lines at each staircase descending to the pool lookouts. This was also the only hike where we spotted large wildlife—a deer just off the path.
| Distance | 1.7km out and back |
| Elevation gain | 59m |
| Time | 30 minutes |
| Difficulty | Easy |
| Shuttle bus stop | 9 - The Temple of Sinawava |
Take the shuttle to Stop 9 (Temple of Sinawava) for Zion's most accessible hike. The flat, paved trail accommodates strollers and less mobile visitors, leading to the start of the actual Narrows hike (which requires wading and is only open when flash flood risk is low).
The walk offers lovely views of towering canyon walls and the river that carved them, plus plentiful shade from countless trees. Squirrels are everywhere, some practically posing for photos as they search for snacks.
Scenic Drives & Hidden Gems Beyond the Canyon
Even if you're not hiking at every stop, ride the Zion Canyon Shuttle the full length at least once. The 45-minute journey from the Visitor Center to Temple of Sinawava offers jaw-dropping vistas through the big windows. It's like a guided tour through nature's masterpiece, helping you appreciate the scale of the canyon.
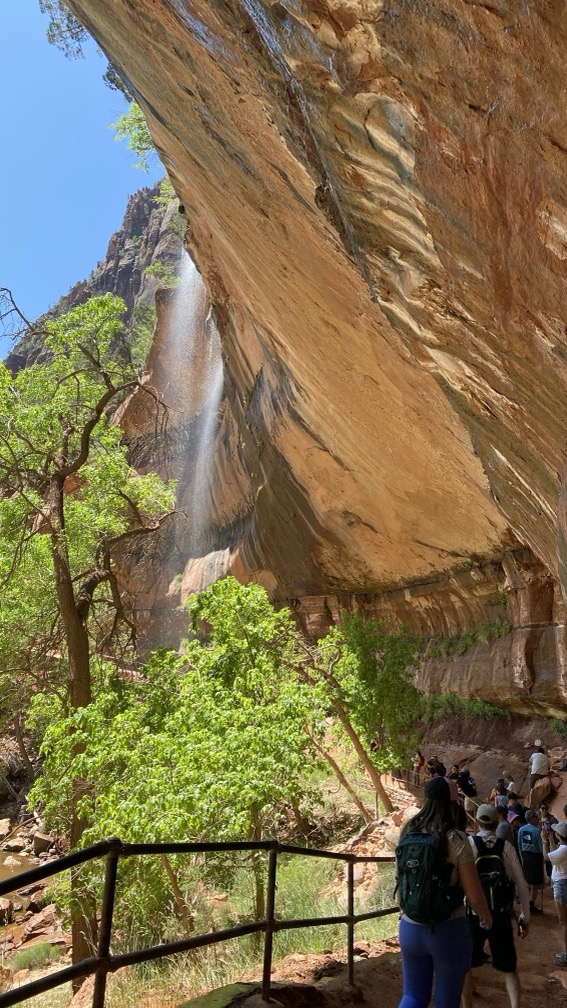
This 10-minute steep walk from the bus stop is absolutely worth it. While other "weeping" rock formations exist in the park, none match this one's flow. Standing behind the falling water with blue skies overhead, seeing rainbows in the desert spray—it's utterly surreal.
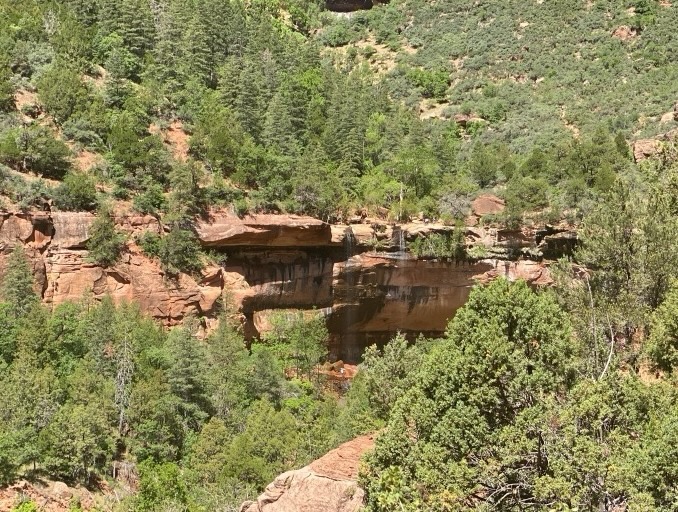
The heavy mineral deposits have painted and sculpted the wall into remarkable zebra-striped formations with natural overhangs. The water flow decreases throughout summer as high-altitude ice melts and rains become less frequent, so visit earlier in the year for the best experience.
For an incredible ground-level view of Angel's Landing jutting from the canyon wall, check out Big Bend at stop 8 on the shuttle bus.
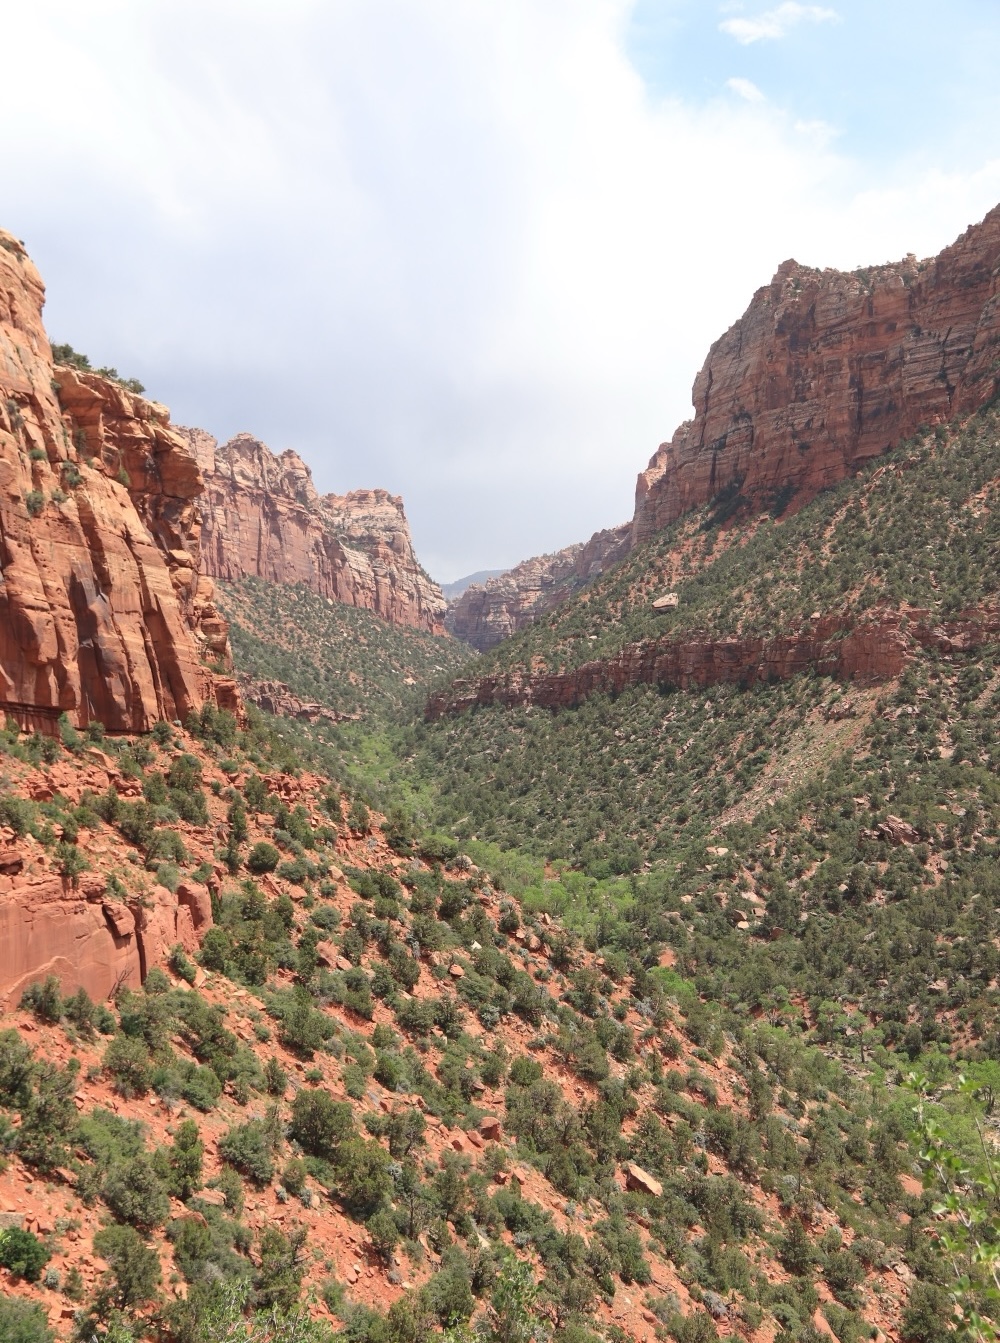
This scenic drive takes you up switchbacks on the valley side—stop for incredible views of natural rock arches and overhangs. You'll pass through the Mount Carmel Tunnel, emerging into a tighter canyon following Pine Creek.
The drive showcases the bright red rocks and stunning sandstone formations that make Zion famous. Don't miss the Canyon Overlook Trail parking lot just after the tunnel exit. This easy out-and-back hike (under 2km, 57m elevation gain, under an hour) rewards you with a view down the canyon overlooking the road you just drove.
Further along, Checkerboard Mesa deserves a stop. Getting out and seeing the colorful rocks up close really grounds you in the park's geology.
Peak season note: The park entrance may close to road traffic to limit tunnel congestion.
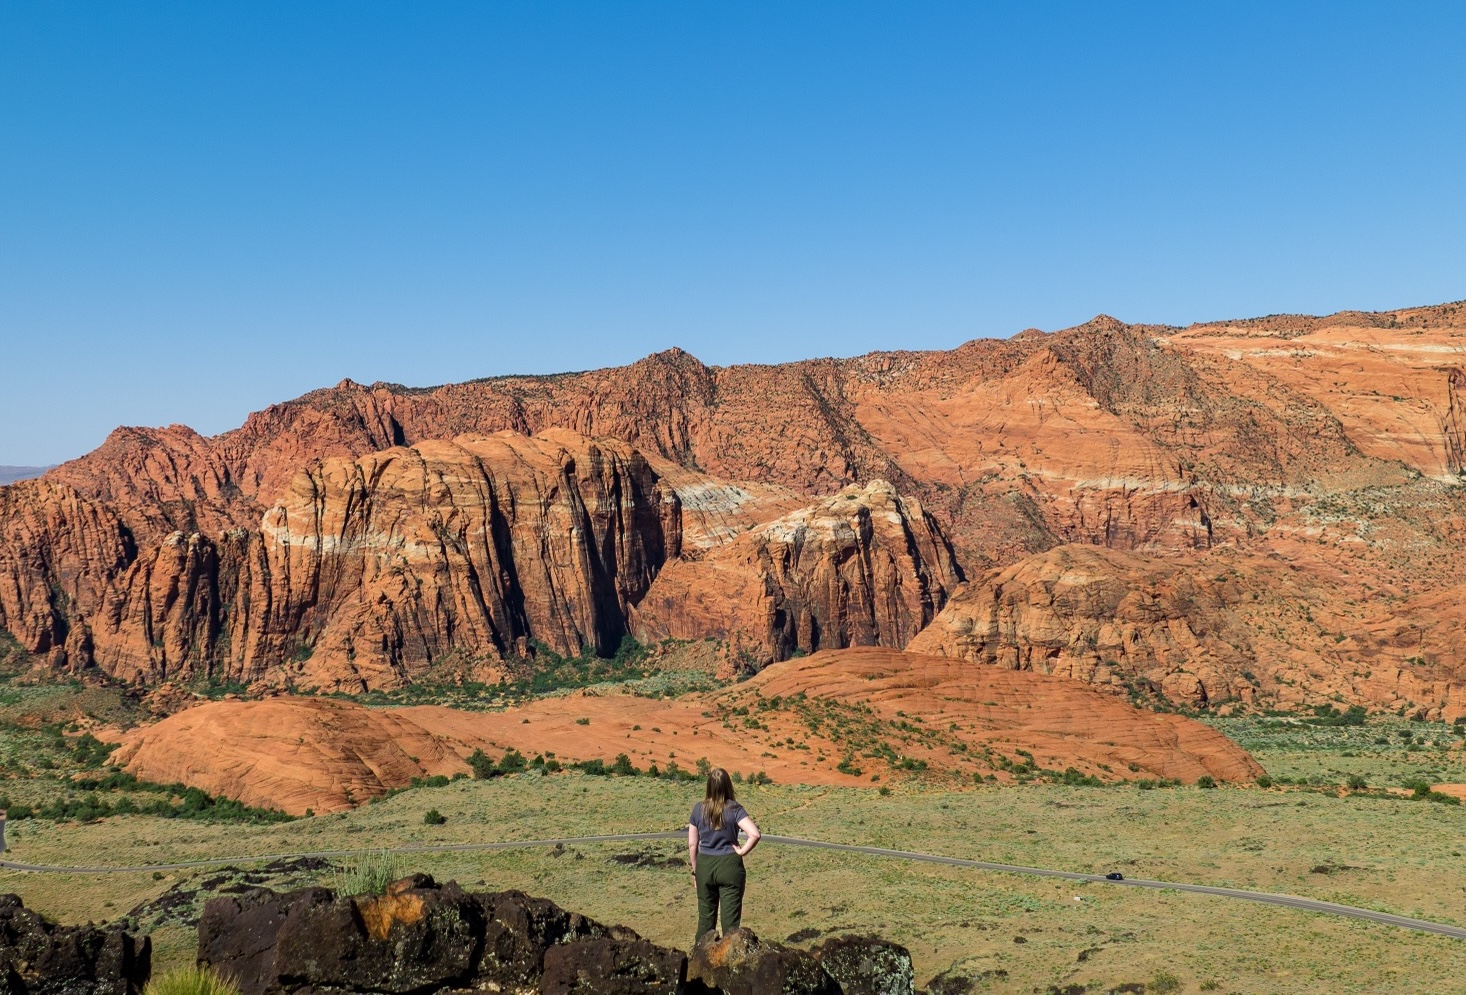
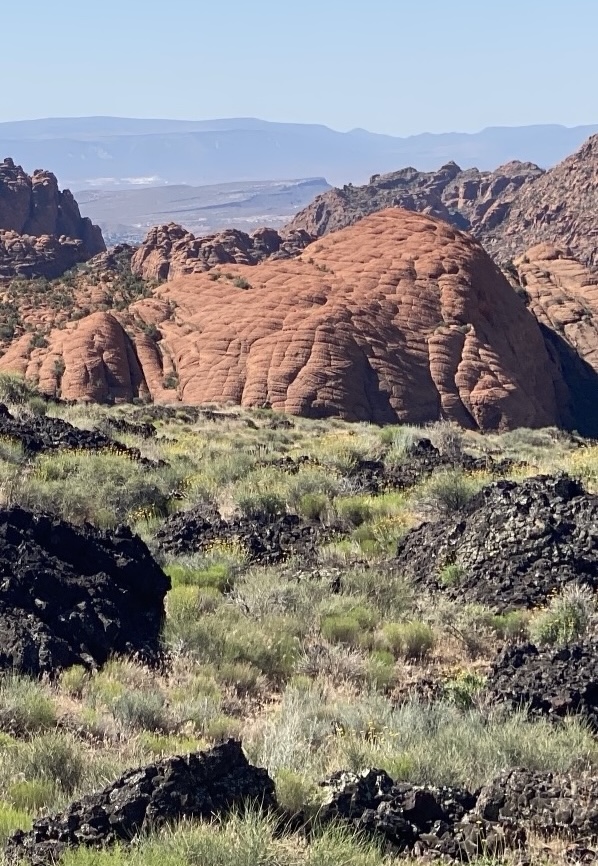
If you're staying in St. George or have exhausted Zion's offerings and want to see more, Snow Canyon feels like discovering a hidden gem. This charming park features more bright red rock in completely different formations including petrified sand dunes, hoodoos, and giant cliffs.
The Snow Canyon Overlook viewpoint is a great introduction to this beautiful valley.
Black streaks of ancient lava flows cut across the landscape, and underground lava tubes (volcanic tunnels you can climb into!) await exploration.

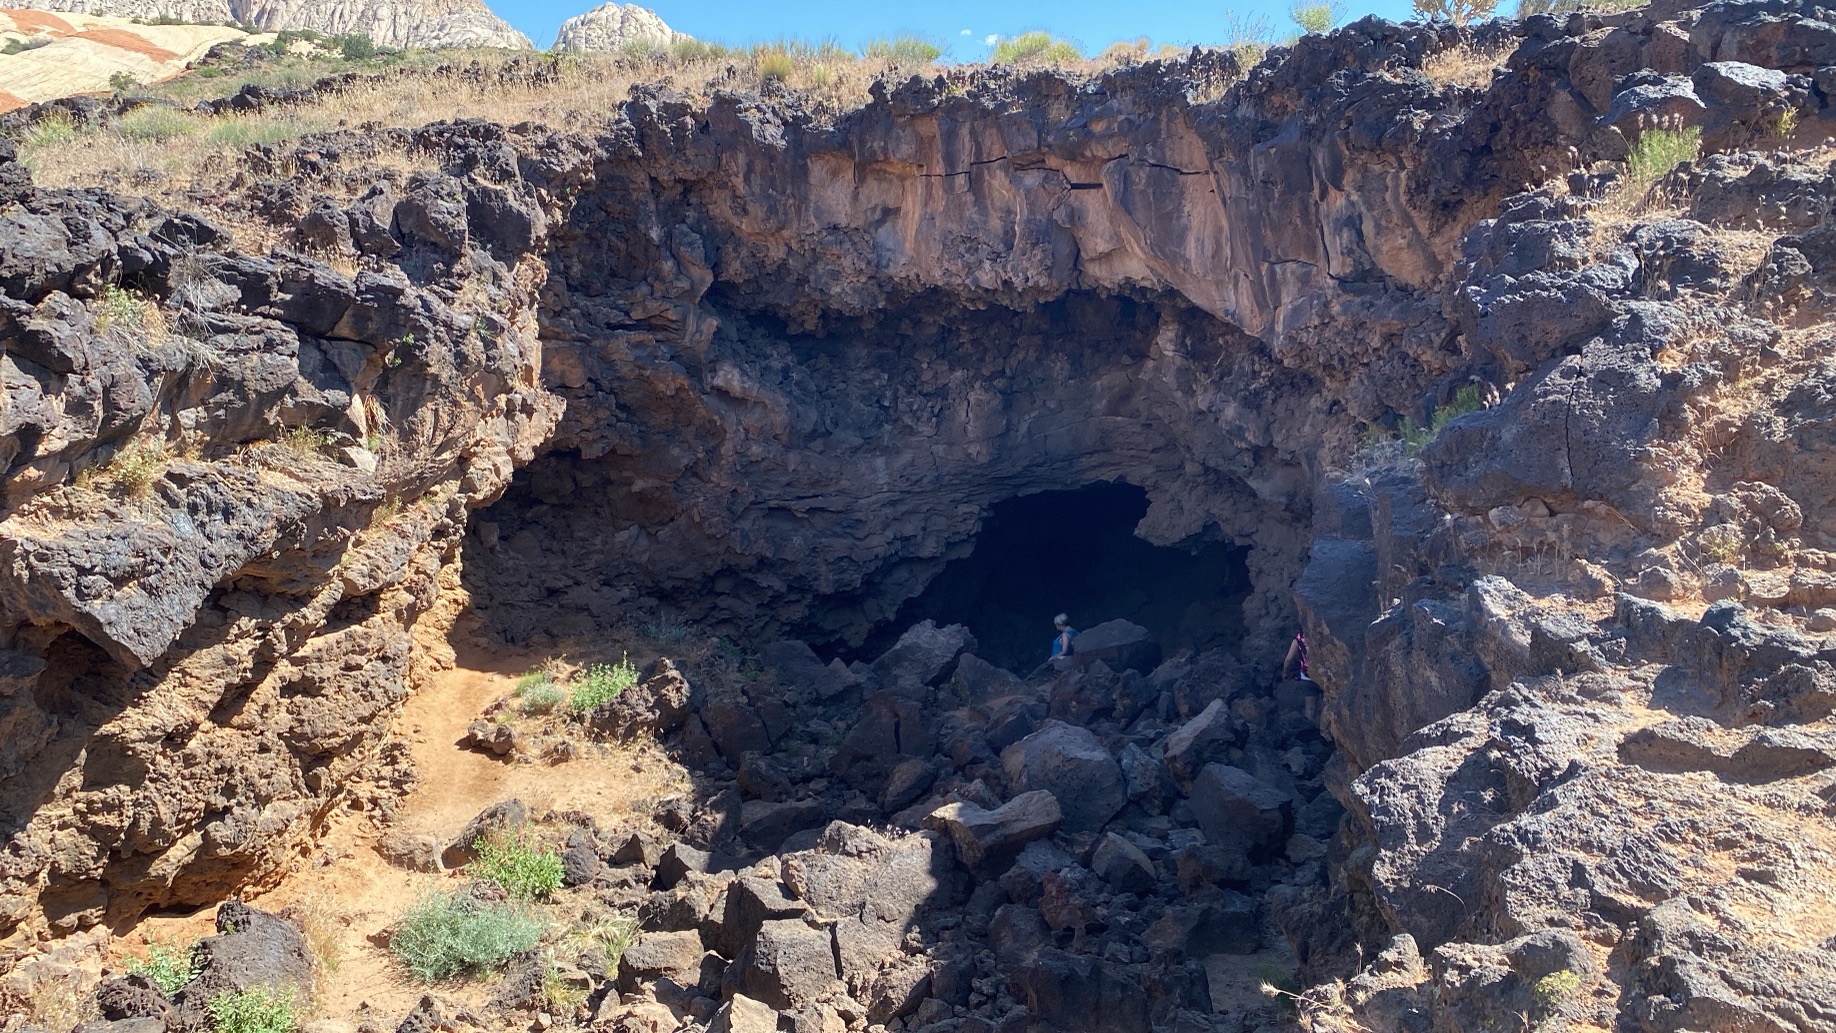
The Lava Flow Trail is our top recommendation. Park at the Lava Flow Trailhead and follow signs for a 3km out-and-back hike visiting three lava tubes of varying sizes. The furthest is an enormous crater with an accompanying cave—we loved climbing down to explore them.
Multiple trails connect to the Lava Flow Trail, so you can also visit the petrified sand dunes. Walking on these is surreal—their shapes seem to defy nature, and the ground lines don't align with the horizon, creating a disorienting effect. Watch your step!
We know you're coming to Zion for the scenery, not the cuisine. Restaurants are expensive due to the remote location, and the food is moderate at best. That said, here are our recommendations:
- Hoodoos General Store (Bus Stop 3): We stopped here every morning. Their breakfast burritos, iced coffees, and iced chai lattes are excellent. Great for grabbing a quick breakfast or packing lunch.
- Bit & Spur (Bus Stop 6): Tex-Mex cuisine with a large backyard patio and often live music. It hit the spot after long hiking days.
- Porter's (Bus Stop 5): American-style cuisine with great views and a small patio. The ice cream parlor next door is a nice bonus.
From March to November, private vehicles are not allowed on the Zion Canyon Scenic Drive—you must use the free shuttle. However, you can drive your own car on the Zion-Mount Carmel Highway (Route 9) year-round to access the east side of the park.
At minimum, you need 2 full days to see the major highlights (Angel’s Landing, Narrows, Emerald Pools). However, to fully appreciate the park without rushing, we strongly recommend 4-5 days, which allows time for backcountry permit hikes or visiting nearby Snow Canyon.
The sheer drops are very real. If you have an intense fear of heights, the final half-mile with chain assists is dangerous and anxiety-inducing. Remember, you do not need a permit to hike up to Scout Lookout, which offers 90% of the same views without the terror!
Don't panic! Zion is massive. If you don’t secure an Angel’s Landing permit, hike up to Scout Lookout or do the West Rim Trail. If you miss a Subway permit, try exploring the Kolob Canyons section of the park for a similarly wild, remote experience.
Permits: Apply early for Angel's Landing and The Subway. Angel's Landing is easier to secure with 800 daily permits vs. The Subway's 80.
Timing: May was beautiful but The Narrows was closed due to a risk of flash flooding. Summer offers more options but more crowds and heat. October to March are the best months to visit.
Sun Protection: Early morning or mid-afternoon is the best time to hike as there is more shade.
Water: Seriously, bring more than you think you need. Fill up at bus stops before trails.
Peak Times (June to September): Expect full buses, crowded trails, and potential road closures. Walking from accommodations to the park entrance is often faster than waiting for a bus with space.
Flexibility: Have backup plans. We couldn't do The Narrows, but having other great hikes lined up meant we didn't miss a beat.
If you're looking to see more before you go, check out our videos below:
- Angels Landing - Hiking Guide - Zion National Park, Utah
- The Subway, Zion: Watch this before you hike!
- The Watchman Trail - Zion's Most Underrated Hike
- Ultimate Zion Itinerary - All Hikes Ranked, Top things to see
Zion National Park exceeded every expectation. From the heart-pounding scramble up Angel's Landing to the peaceful Riverside Walk, from the exclusive Subway formation to the surprising gem of Snow Canyon—every moment offered something remarkable.
Whether you have two days or five, whether you're chasing permit hikes or prefer easier trails, Zion delivers. The key is planning ahead, understanding the shuttle system, and being prepared for the physical demands of the hikes.
The red rock canyons, the dramatic cliff faces, the interplay of water and stone—it all comes together to create one of America's most spectacular national parks. Start planning your trip now, and prepare to have your breath taken away.